
Map
If you have a map setup on your theme from v6.3.0 or earlier, most settings in this section have changed and you will need to reconfigure your map section following the instructions below.
The Map section can display a Google map with multiple location markers as of v7.0.0, or only one marker in older theme versions. All of the instructions in this documentation are for v7.0.0 and above.
This Map can support up to 50 locations. If you need a more robust map, we recommend trying the Stockist Store Locator app.
Google Maps Platform Setup
Steps to setup a Google Maps account:
- Visit the Google Maps Platform page and click Get started. https://mapsplatform.google.com
- Select the Maps, Routes, and Places products to get the APIs that are needed to work with the free themes Map section.
- Click Continue.
- Either create a new name or select an existing project.
- After agreeing to the terms of service, click Next.
- Create a billing account with the Google Maps Platform. A billing account is a requirement in the new Google Maps Platform. For more information, see the Google Maps Platform pricing and billing documentation.
- After enabling the Google Maps Platform, copy your new Google Maps API key to your clipboard.
- Go to the Google API credentials page: https://console.cloud.google.com/projectselector2/apis/credentials
- Select your project from the menu.
- Choose the API key that you generated to begin editing.
- Under Application restrictions, click HTTP referrers (web sites) and enter any domain associated with your store, including your .myshopify.com domain. For example, if you have a custom domain, then enter both https://myCustomDomain.com/* and https://shop1.myshopify.com/*.
- Click Save
Add the API Key to the theme
- From your Shopify admin, go to Online Store > Themes.
- Find the theme that you want to edit, and then click Customize.
- Navigate to “Theme Settings”, which is the second icon, the paintbrush icon on the far left menu of the theme editor.
- Choose “Maps” from the list of settings.
- Paste your API key in the “Google Maps API key” field.
One thing that’s really valuable to note, is that there is a “Backup image” option in each Map section. If you don’t want to go through the process of getting a Maps API key, you can upload an image here that will show instead of the map if when there is no API key entered. You could take a screenshot of a map on google.com/maps and upload it here to display instead of the interactive Google map. This backup image will also display if there is ever an error and the Google map doesn't show.
Add location markers to the map using section blocks
In the left sidebar, underneath the "Map" section, there's the option to "Add Location". Each one of these Location blocks will become a marker on your map. The map area will automatically adjust to ensure every marker you add is visible. There are three input fields in each block.
Map address
This is the address that Google will use to place your marker. It will not be displayed anywhere. Every location block must have an address entered or the map will not work.
Location name
The name of the location. This is what will be displayed in the location details underneath the map, and inside of the info window when the marker inside the map is clicked.
Location details
You can add any text here you would like to describe the location. We recommend adding the address nicely formatted and any other relevant information about the location like open hours or a phone number. This information will display underneath the map when the "Show location details underneath map" checkbox is checked within the map settings.
Settings
Heading
The heading for the section.
Heading size
Select the size of the text for the heading.
Text
The description text for the top of the section.
Text size
Select the size of the text.
Show heading and description in an overlay text box
When this box is checked, the above content will display in a feature box overlapping the map instead of above the section. Here's an example:

Text box color scheme
Choose from one of the available color schemes for the overlay text box
Text box shape
Choose a shape for the text box
Map options
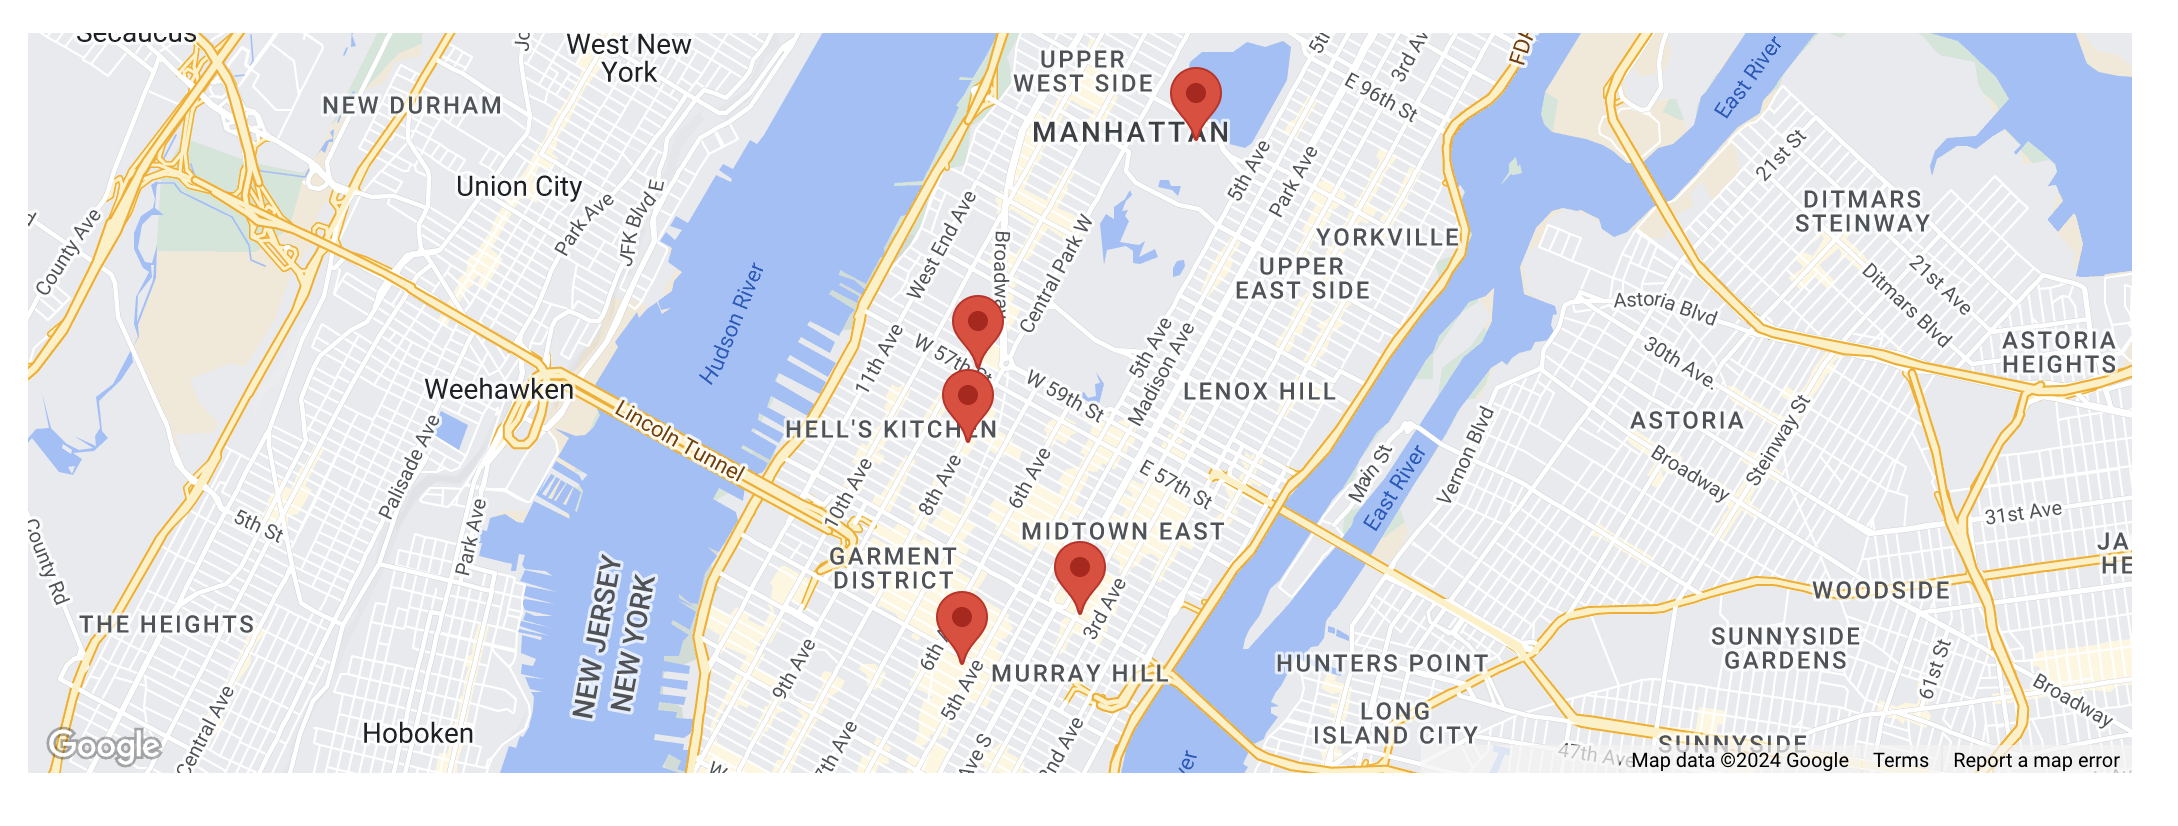
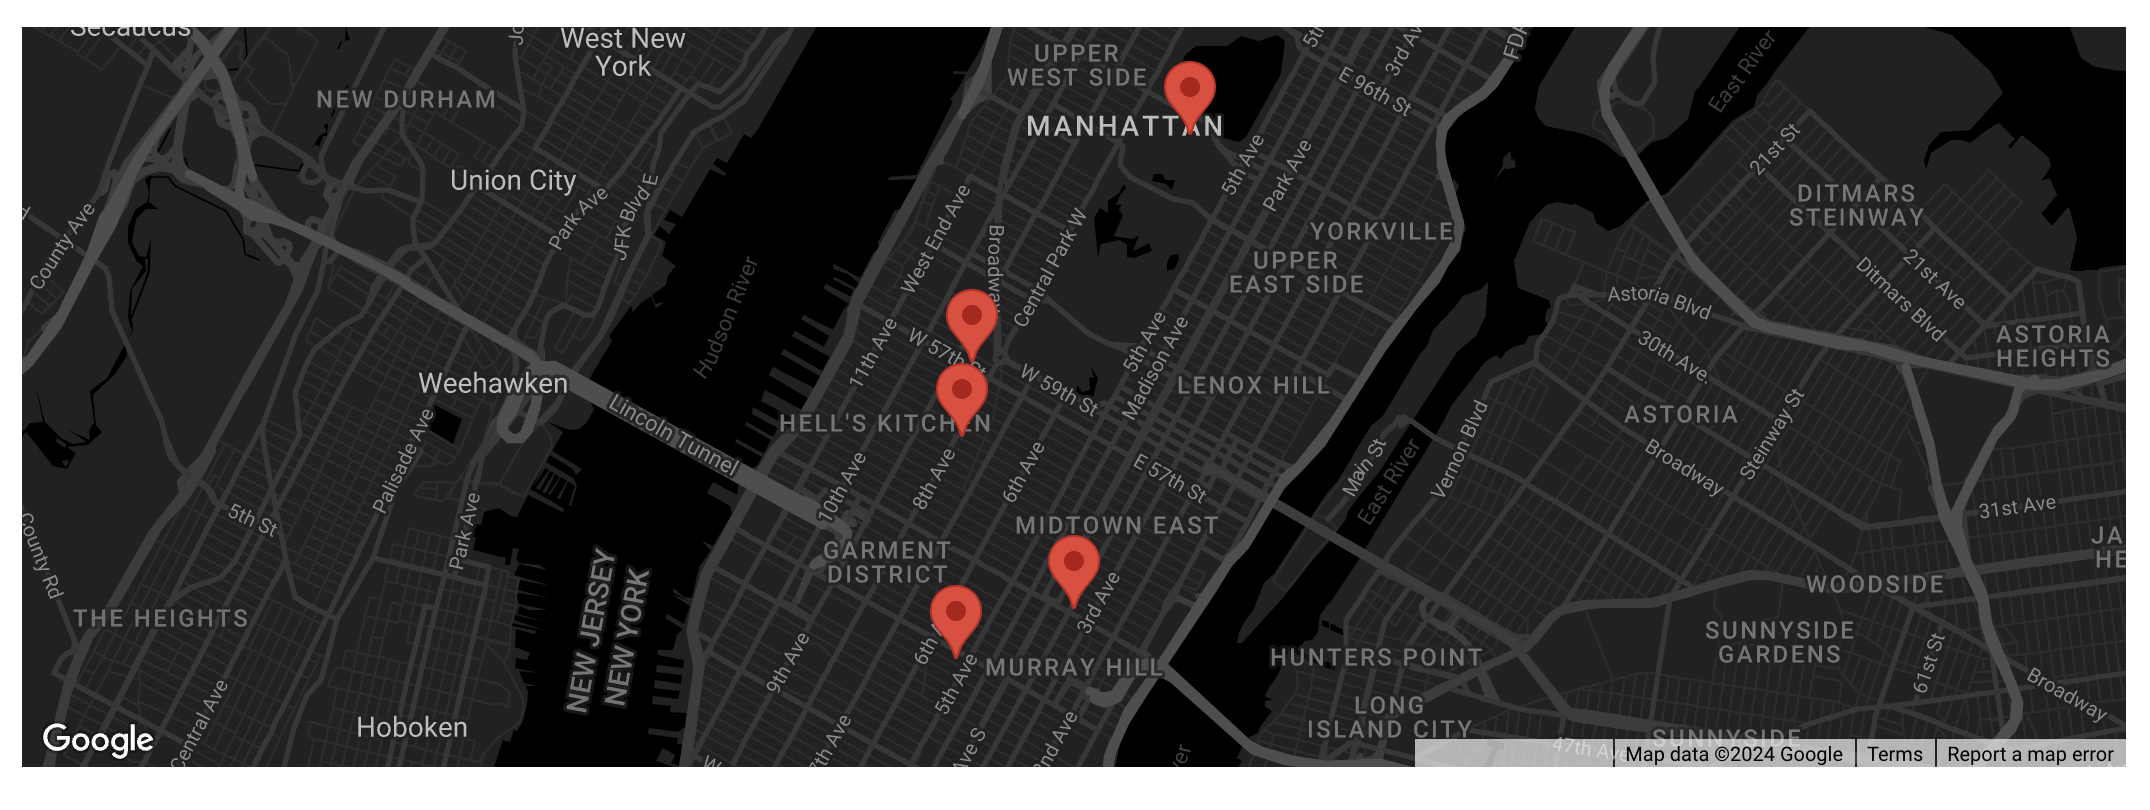
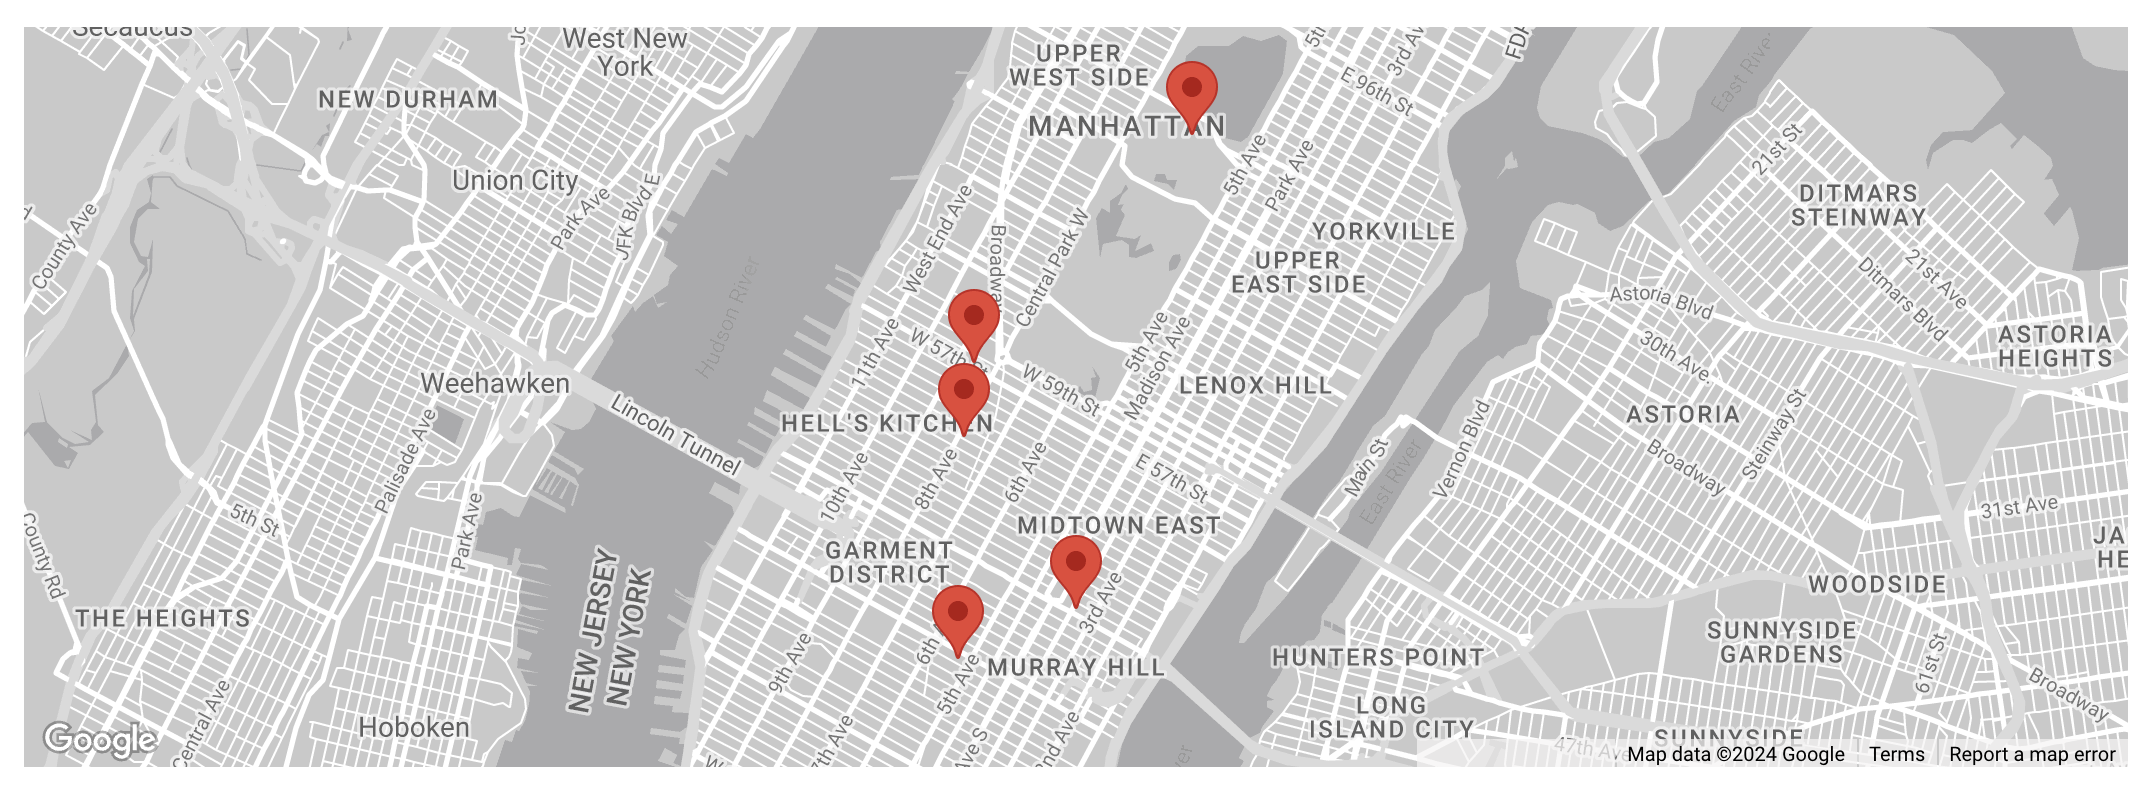
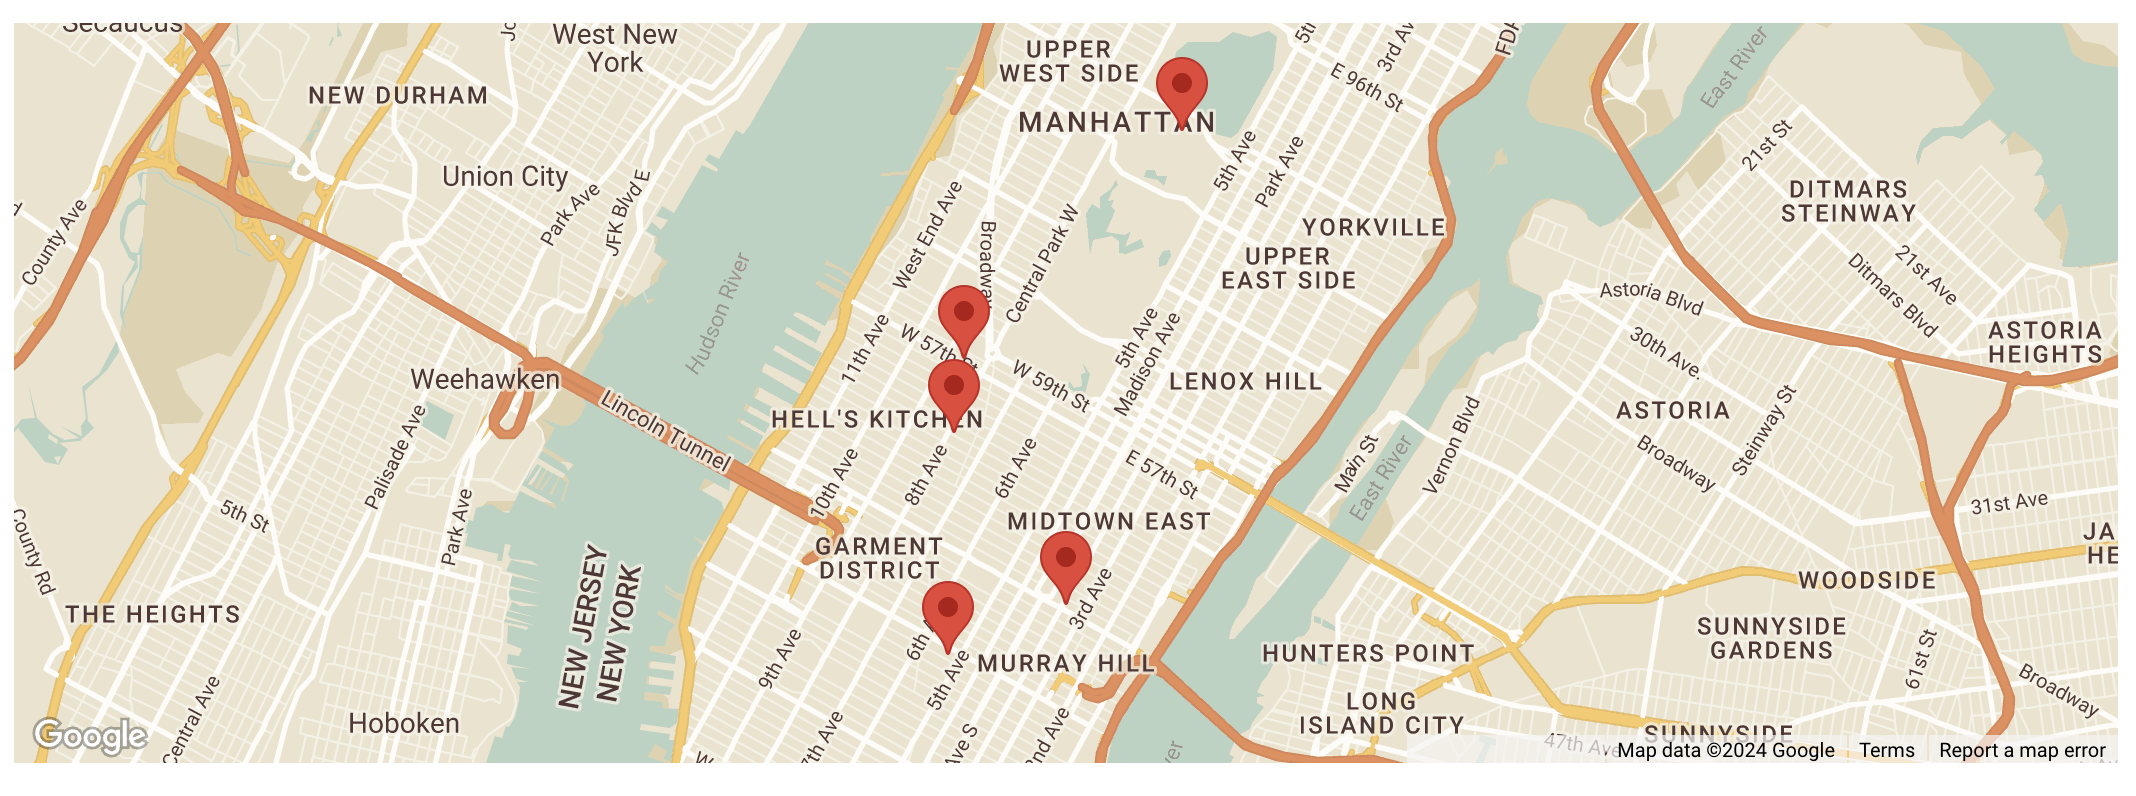
Map style
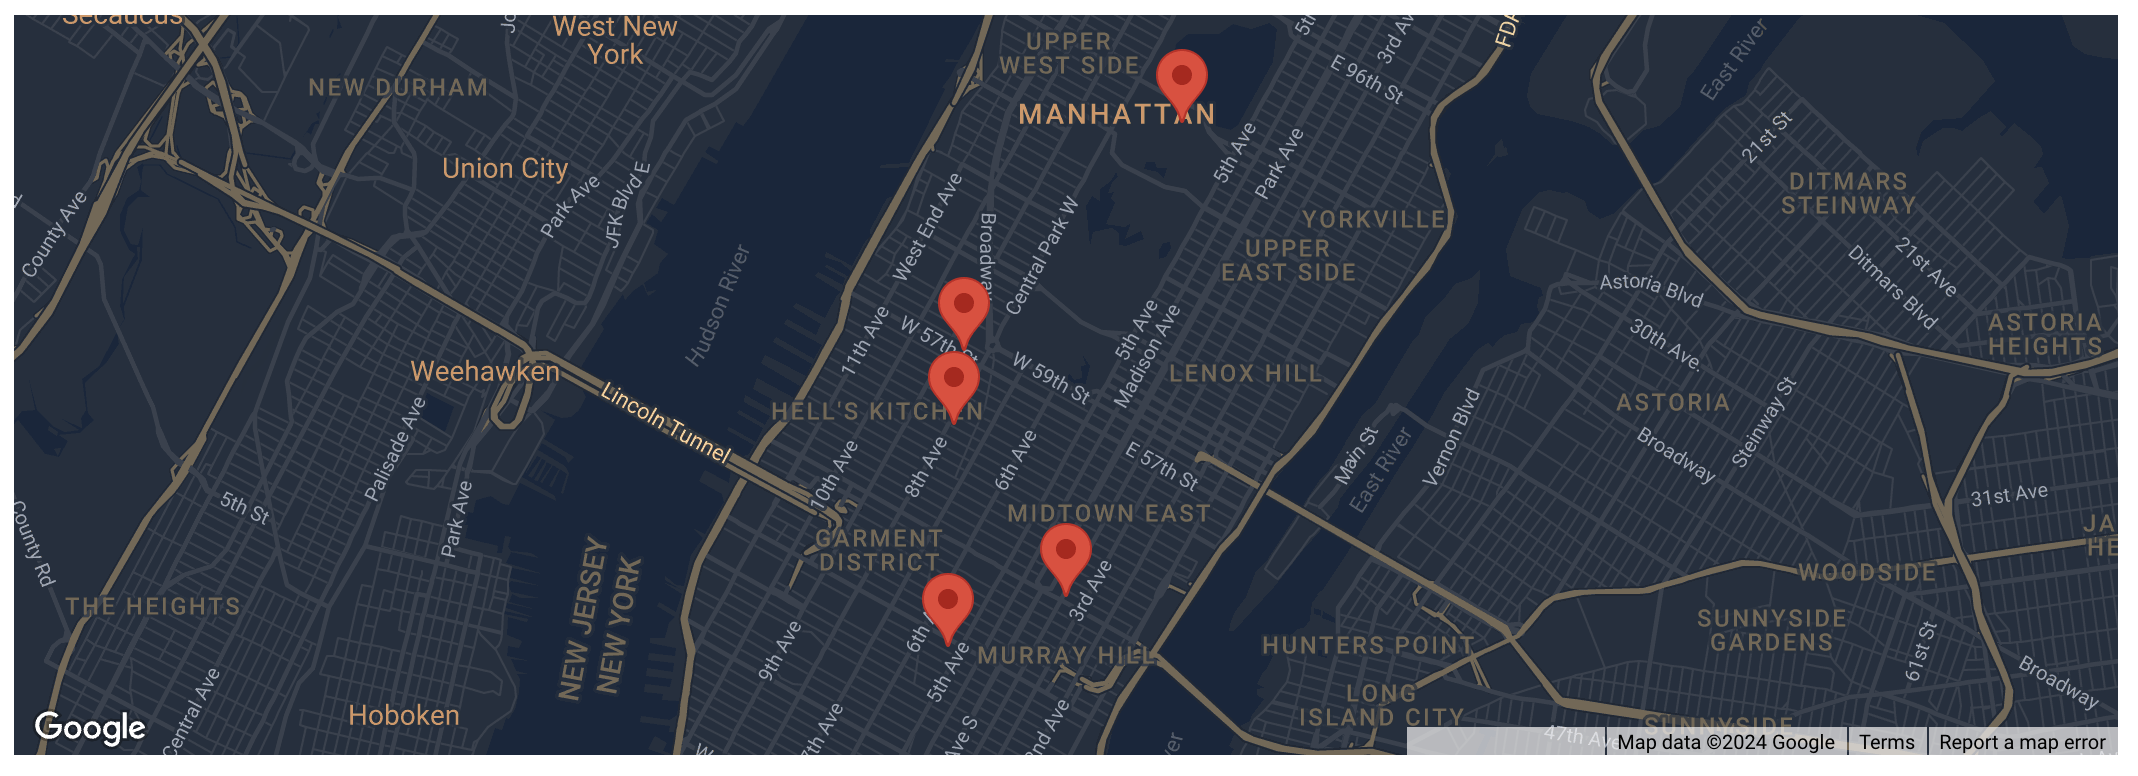
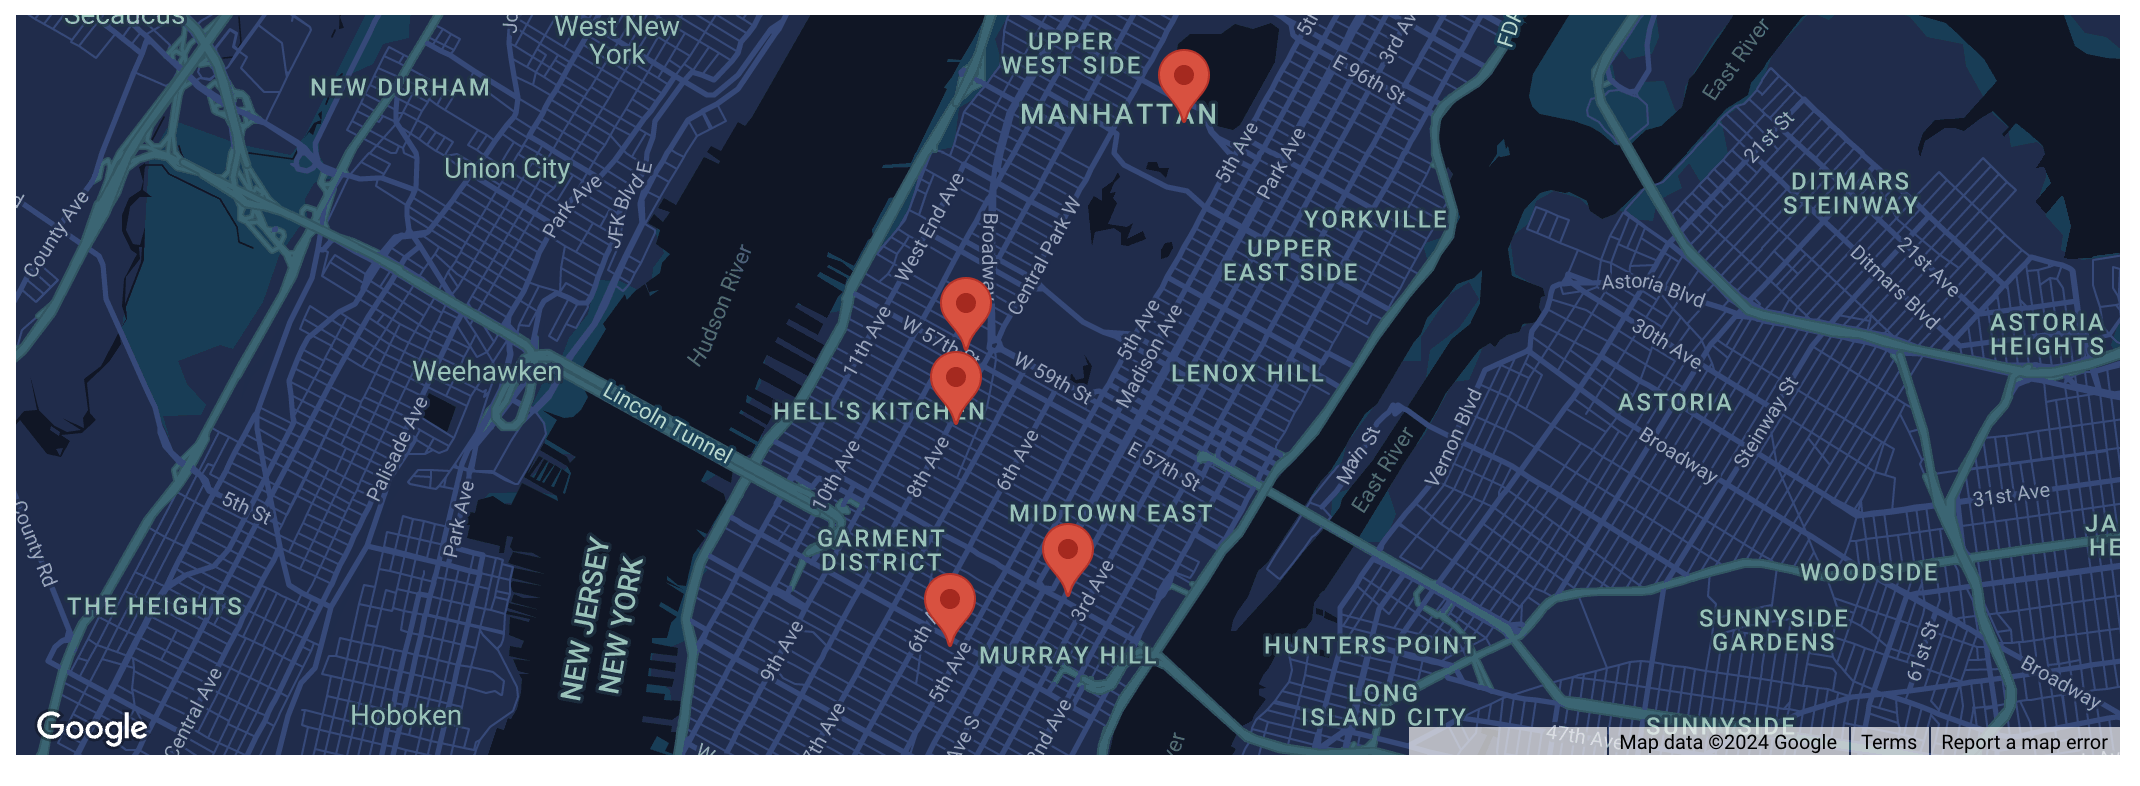
Choose from 1 of 6 color styles for your map.
Show Google Map Controls
Check this box to show Google map options as buttons on the map like zoom and satellite.

Custom marker image
Upload your own image to use as a location marker instead of the standard red marker. We recommend using a png with a transparent background. Here is an example from our Frulla demo store:

Custom marker height
Adjust the height of marker to increase or decrease it's size on the map. The minimum allowed is 44px which is required to meet accessibility requirements.
Show location details underneath map
When this box is checked, the details of the location that are added in each block will display underneath the map. In order for a location to display here, the location block must have either "Location name" or "Location details" filled in. Columns will automatically be created to fit however many blocks are displayed. Example:

Location name text size
Select the size of the Location name.
Text alignment
Choose the alignment of the location block text.
Show directions link
When this box is checked, a link that says "Get directions" will display in the location blocks, and in the information window when the marker in the map is clicked.

Backup image
Upload an image here to use instead of the map. If there are no location blocks or there is no API key entered in Theme settings, this image will display.